skip to main |
skip to sidebar
 Goodness, it's been a while; I'm sorry! I truly am. I really haven't been drawing; I've been focusing on writing my book, or generally just too busy. But, yesterday a wondrous thing happened... I drew three times in one day! (I'll upload the first two doodles at another time). The first was because I was a little bit bored in a lecture. The second was because I had an art class and we had to draw portraits of each other (this was for part of my degree, and thus to illustrate a point rather than practice any art skills), and the second made me really want to draw a portrait! so I started doing a very stylised portrait based on some stock I found on DA (link). Here's the sketch. Enjoy. :-)
 It would be nice to draw this one up! This was a theraputic neat sketch I did today, about an hours work. This is a scene from my story where Brithilca the dragon takes the crown of the Dragon Kings from where it is kept. ... I wont spoil any more of the story. ;)
It would be lovely to digitally paint this one up (with a background, I imagine this to be in a main hall of the monastery... But I wasnt creative enough to sketch it on!) to practice scenery and to paint all those delicious dragon scales! I've yet to digitally paint Brithilca, I have only ever coloured him traditionally before. :) And also, I have never drawn the abbot before so it would be nice to paint him... :)The main point of this was really to practice my dragon anatomy. I always wish I could draw them better! I think have pinned down Bri's design / anatomy a bit more realistically here than in past attempts. I have been thinking about his anatomy and scale arrangements... Dragons are hard cause they dont really exist in real life so theres no definitive references to them. So I have been considering the features and functions of his anatomy, how he evolved to require certain muscles, and armous, etc. Haaard lol. I used the Dracopedia by William O'Connor for some assistance. That really is a great book for dragon fans. :)
(PS Bri's tail got cut off by the edge of the page. Whoops!)
 Can't believe I forgot to post this here.. sorry! Enjoy :-) This is a commission I finished a few weeks ago now.
Some concepts for a commission.. :-)
 Ok so, Concept 1 (top) is meant to be the two characters laying down (on a bed?) with the male dangling some mistletoe! I thought maybe they could also be laying ona rug with a fire in the background, or a window to a snowy scene, etc etc.
Concept 2 (bottom left) is meant to be the characters snuggled up in bed.
Concept 3 (bottom right) could be a more easily adapted scene in terms of location. Indoors, next to a roaring fire? On a snowy hill? (etc etc)
Polishing, firing & Finishing: a.k.a. Ultimate Disaster Occurs! After leaving my piece to dry from Friday night until Saturday afternoon, with a couple of bursts of the hairdryer too for help, I sanded down my piece, using a simple nail file. I was able to easily remove most of the imperfections and lumps and bumps - I spent a few hours on this section; picking it up, doing a few minutes until it looked "fine", then leaving it for a while, coming back to it, seeing all the new imperfections I hadnt noticed, refiling it... rinse and repeat. Like you would with an art piece, leave it and return several times, and hold it at arms length, honestly criticising it to try and make the best of your piece. :-)
To make sure it was truly dry I did not fire it until Sunday afternoon.
I fired my piece on my gas hob. As such, I purchased this handy metal net to rest my piece over the hob on. The smaller finer piece, is cut specially so you may bend it into a box shape (shown a few steps below), which means that if, for whatever reason your piece spits, or explodes (etc) its contained.

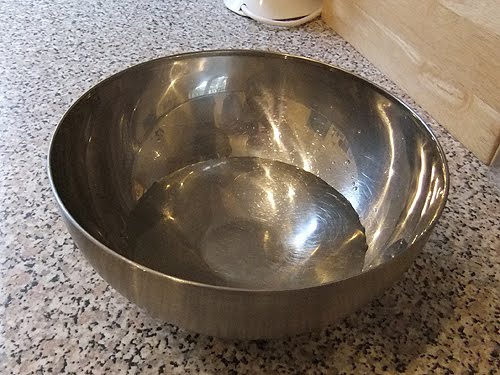
I filled a stainless steel bowl with some water to finish off cooling the piece (I dont know how important the stainless steel part is really, my instruction sheet specified it, so seeing as we had some in the cupboard I used it.... might try it without though).

Timing is important - I took off my watch so I could observe the time easier. I fired for a total of five minutes.

I switched on the hob, to find the hottest part of the steel net (which part glowed red), picked a red spot to put my piece on, then turned off the hob so I could safely lay my piece on it, with a pair of cheap tweezers I bought from Tescos the other day for the purpose. Very handy!

I laid on my piece, formed the little box from the smaller steel mesh as shown about and placed it over the piece, lighting the hob again after. Now, there are two things to note here; firstly, my piece looked rather unremarkable for the whole firing. No burning, spitting, glowing.... absolutely zilch. Did I do it right? Who knows. The piece shrunk by the recommended 10% so.. I can only hope so!
Secondly to note; the smell. Oh my god the smell. THE SMELL WAS HORRENDOUS...... Now, as it turns out this was *not* the fault of the silver clay, but rather the mother of pearl setting.. which as you can see below.... does not have a very high tolerance of temperature.

That is to say, it was totally, utterly destroyed. Such a shame.. Lucky that it was a cheap gem to buy, but its still a sad shame. It was so so beautiful. :-( Needless to say, that was unsalvageable. As you can also see, the silver shrunk so much it cracked noticeably. I'm not sure how to get around that..?? Maybe you have to use it in much thicker quaitities (I shall certainly try that..) to avoid this. So, a disaster all round, really.

Then one of the leaves fell off. Oh bother, was that the final straw! After leaving it to cool for the recommended 15 minutes, I dunked it in the bowl of water, and dried it off, before setting about to see if I could salvage it.
 Well beyond repair.
 Um.... really... REALLY... beyond repair. The shattering of the mother of pearl was actually quite pretty (the internal layers had retained normal pearlescent sheens) but unfortunately not suitable for me to use anymore...

Firstly, I took off the mother of pearl (it came away easily), and chipped away the raised border I had creates, as totally as I could.

Using the magical polishing cloth I bought, and also the steel toothbrush too, I furiously scrubbed and rubbed until my piece polished up (this is the front, you can see the remains of the border...). The nice matte silver finish was quite pretty (but I do wonder how to get it truly shiny..).
You can also see two fracture lines: as the piece was, let face it, ruined, I decided to test the strength of my piece. Disappointingly, it snapped under very little pressure from my hands, very brittle and fragile (again, must make thicker next time..). Glued it back together - bless super glue! It was to become my good friend during this most hard of rescue missions!! I actually quite like the fracture lines, nice addition of character...

This was the back of the piece, polished. Scrubbed up quite nice actually, very smooth finish. Quite liked this.

In the end, I cut a piece of copper sheet the same size and shape as the mother of pearl, and super glued it in place on the front of the cabochon. This became a two sided piece; this was the back, where I reattached the leaves. Simple, but nice, I think.

I didnt want to leave the front to be a mess though! I also couldnt leave it bare with just he copper sheet on it, as the remains of the border were quite ugly. So, I got out my super huge beading kit, and rifled through it to find something suitable to add on. In the end I went for small turquoise chips (again, glued on).
Overall I think the final pendant is *ok*, but obviously compared to the initial ambition, concept and ideas I had, its nothing in comparison. A disappointment really, but I'm glad I was able to salvage it to soemthing unique and useable (especially since theres about £7 of pure 99.9% silver in the piece....).
Overall, with regards the silver clay, there is obviously a LOT of room for improvement. I'm viewing this experience with mixed emotions.
On the one hand; I failed at something I experimented in, in essence. That incenses me to try harder, and succeed. I do not like to be beaten!! This is a puzzle I will endeavour to solve - at least until I run out of silverclay to work with!
On the other hand; this material is a veritable NIGHTMARE to work with, no shadow of a lie. This may be partly down to my own inexperience, but let face it, when the apparent *slow dry* clay seems to be totally dry within a minute or two of removing from the pack, and the *normal* (i.e. faster) dry clay seems like it will never flipping dry, theres some head scratching and panic on my part! I have learned the hard way never to fire stones/gems - you may lose them (and they may stink out your house in the process...). Don't do it kids, just don't do it!
In conclusion though, would I do it again? Definitely. Like I said, I don't like to be beaten! Its an intruiging material to work with, for sure. Give it a try if you can, but be prepared to lose your money if and when it goes wrong.. then again, maybe just don't make the mistakes I did! ;-)
Kind regards from a beginner,
Let me know how it goes,
Meg!
Design & Sculpting
Ok, this is the part where I did the bulk of the making of the piece, which for reference took about 45 mins. Firstly, I produced quite a few sketches, see below, and ended up choosing the one on the far right (drawn to size) as it had a more simplistic design. I was, in the end very glad I had chosen a more simple design, as I was quite overfaced by getting used to the clay. After making my first piece with this material I can safely say don't jump in on the deep end with this material, not least because it takes time getting used to, but also because its too expensive to waste!!


Ok, so, sketches done, I got a handy bit of tracing paper, and traced out the outside of the shape, drew where I would put a hole (so I could put in a bail to hang it from a chain), and also drew where the gem would sit on the centre of design - for this design I picked a 25mm x 18mm Mother of Pearl cabochon (cabochon = a flat backed gem, so its easier to mount). I cut out this design for later.

Here's what the silver clay looks like in person.. not very silver! For this piece, I used about a fifth of this teeny lump, I would estimate, maybe a tiny bit more.

Here's where the tracing paper came in very handy. Firstly, I rolled my lump of clay into a little ball. I put that inbetween two sheets of baking paper (so it wouldnt stick to my roller), and rolled it out quite thinly. I would estimate that the thickness of this base is about 0.75 - 1.00 mm thick. I don't know how good or bad that is as a thickness - I will find out upon firing!
After rolling, I put my cut out tracing paper on top of the shape and cut around it using a sharp scalpel blade to get the basic shape. I tried to be careful but it isnt very neat at this point. As you can see from the very small ball, this amount of clay was only just able to make my shape (it really doesn't go far...).

In this piece, I thought it would be nice if, from the back of the piece you could see through to the stone, so as you can see I cut out a leaf shape from the rolled out silver to make a little window.
I think its important to note at this point I was finding the material quite hard to work with! The clay I purchased was Slow Dry clay but, to be honest this dried out immensely quickly. I could honestly do very little with it at all and it was so so hard to work with once it had dried. I suppose I could have added some water though to see if that helped. Note to self, I'll try that next time! As such I decided to simplify my design further on this piece (rather that than ruin it at this stage!). I made the cutout piece, and the spare blob from the last step into small leaf shapes.
I also purchased some silver clay in a syringe (which they advertise as very helpful for making patterns and such). It was, but I found it a really really hard material to work with. Oddly, this was not slow dry clay in the syringe, and seemed to be much wetter and stickier than the slow dry clay. This seemed VERY backwards to me!!! So yes, the syringe clay was a nightmare to work with. It was immensely sticky, and blobby, and I found that it came out of the syringe in a far thicker blob than I would have liked.
There aren't any photos of this stage cause I was too busy getting covered in clay and having a nightmare!
I placed the stone in the middle of the design, and dragged the syringe around the stone to form a border (shown below) which would hold the stone in place. It came out very irregularly, but, seeing as the clay was too unpredictable and unhelpful to work with, being this wet and sticky, I felt I had to leave it a few minutes, then returned to it, and began smoothing out the border around the stone into some sort of consistent flow. I also sat the two little leaf shapes onto the border (where the stickyness of the stuff proved helpful as it cemented the leaves onto the piece)

As you can see it looks kinda messy. I smoothed it out as best I could to say the syringe clay was basically like paste and left it to dry.

This is a shot of the same step from above. The mother of pearl has a really pretty sheen to it :)
Thats all for now but stay tuned! Next time, I'll be filing & refining the dried design and.. gulp... firing it!
Internet Shopping
So, I excitedly ordered myself some silver clay from the internet, and couldn't wait to begin my experimentations into creating wonderful works! I have seen some stunning metal clay works on DeviantART, and wow oh wow, do I want in on that! I've always wanted to work with metal and heat and never realised that metal clays even existed!Now, this is my first try with metal clay, and since I'm not sure what its like, and whether I'll truly enjoy it, I bought the minimum amount of things I could, really, my logic being that I should spend a lot of money on something I will never do again.So, for the sum of £63.50 I purchased the following:1. 1 x Gas Hob Firing Mesh - With Cover £6.95 2. 1 x Art Clay Silver 650 Slow Dry Clay - 20gm £28.50 3. 1 x Art Clay Silver 650 Syringe - 1 tip - 10gm £19.95 4. 1 x 3M Polishing Paper - Blue - 9 Micron £1.20 5. 1 x Modelling Knife £2.956. 1 x Stainless Steel Brush - Long Bristles £3.95The artclay itself was by far the most expensive, surprisingly so, but, upon receiving my package in the post, my initital thoughts were overwhelming disappointment.... As you can see below, yes I have an array of new tools to use (which will complement my super sculpey tools from my polymer clay work) which will be very useful but, the silver was very disappointing. As you can see in the picture below, which shows the 20g portion of silver clay next to my thumb, the portion of silver you get is absolutely miniscule.... It made me very worried to think that I might not be able to get much out of it in terms of seperate pieces (and also quite upset at the need to have to spent *so* much money to get so little!) . But, I will endeavour to make the most economic use of it that I can and see how far I can stretch it!
 That's all for now, but stay tuned! Next time, I'll be finalising my designs and delving into my silver clay...!
 Subject to clients approval this is the final version of the commiission. I am actually pretty happy with it, and it was a lovely piece to draw :-)
Today, I made my very first cake! How exciting :D
I made it to the basic recipe of a Victoria sponge, but for the decoration I made it up myself so I'm so so happy with how it came out! Tomorrow is when it will be tasted properly (We've had the offcuts and it was very nice but havent tried the proper finished cake yet!) so I can only hope it tastes as nice as it looks :D
There are obviously some rough patches - this is a first attempt so far from perfect! but gosh, so fun! Very tiring though, it took me an hour to prep and cook this, and TWO WHOLE HOURS to decorate it! So tired right now haha!.
Enjoy!
You can see the final thing here: http://imaeko.blogspot.com/2010/09/megs-first-cake-finished-thing.html
 Cake is in the oven! :D

Cakes out of the oven! Looking VERY delicious and edible (and I can vouch for it smelling divine too!), but a little on the uneven side!

So I evened it out with the bread knife... :-)
 I prepper some buttercream (1 part margerine to 2 parts icing sugar) which tasted very nice when I tried it! ;-)
 I sliced the cake in two to prepare it for filling.
 Here's the filling! Lightly heated some jam to make it spread better, and put one filling on each layer.
 Here's how I prepared the lilies. Cut a heart shape for the petal (its the top of the heart that you "seal" up), and a small ball for the centre. I coloured the ball with yellow food colouring (brushed on and smushed in by my own fair hand. It got a bit sticky so I had to add extra dustings of icing sugar :D )
 The finished decorations! I added food colouring to the bow in the same way as the lilies. The lilies look very pretty but I know I can do a much neater job!
 Time to sandwich together the two halves of the cake!
 Here I rolled out ready to roll fondant icing and laid it over the cake, smoothing it fown the sides and triming the excess (this is where I require most practice out of everything methinks! Its hard!!)
And, apart from adding the decorations on top (final pictures posted seperately here: http://imaeko.blogspot.com/2010/09/megs-first-cake-finished-thing.html) thats it!

 Hey, look, I'm actually drawing!! This was a post I meant to make a few days ago haha. But look. A photo. To prove I'm actually drawing! You can probably guess from what's laid out on my desk what I'm drawing, bwaha. I do love Mr O'Connor's "Dracopedia" book. Really helps with pinning down dragon anatomy.