Monday, 25 April 2011

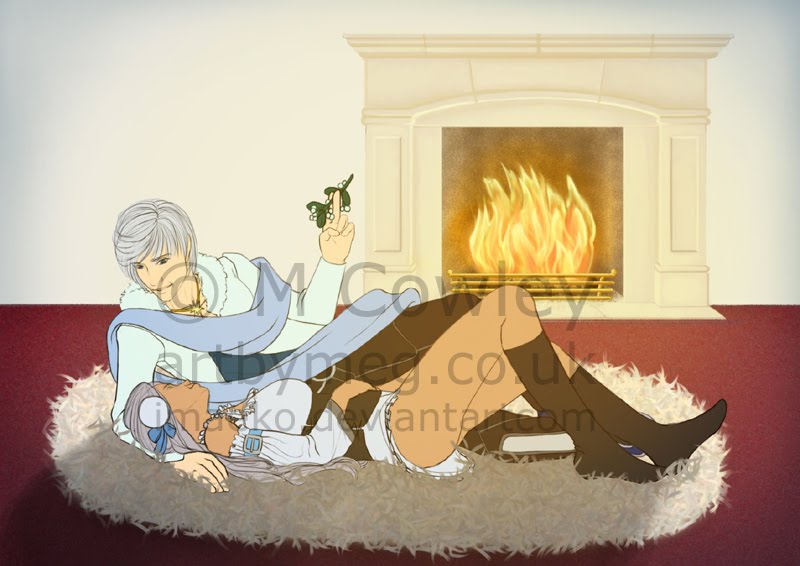
Oscar & Marco : Final Piece


Final piece, approved by the client. Got some prints of this done today and they look great! <3 I think I will start to offer prints of my digital work. Theyre actually pretty easy to do.. :) You can see the animated WIPS here: http://imaeko.deviantart.com/art/Marco-and-Oscar-WIPs-Animation-205903500

Friday, 22 April 2011

Oscar & Marco WIP9


About another half hour, so 9 hours in total on this now. I am hoping this is the final draft - currently awaiting client approval on this. Once received I'll post up a larger final version. :-) This has been a really different challenge to normal, but I've definitely enjoyed it! :)

Oscar & Marco WIP8


Another hour working on Marco's ear and eyes - just his chest & general tidying up to do now! :) Up to 8 and a half hours now.

Wednesday, 20 April 2011
Oscar & Marco WIP7


Another hmm.. I'd say half hour on this, working on Marco's face. Just really got his eyes, upper right quadrant of the face, and chest to do now. :-)

Sunday, 17 April 2011

Oscar & Marco WIP6


Another hour on this now. Marco is starting to take shape. :-)

Oscar & Marco WIP5


Another hours work on this - I have started Marco here. I have a feeling he will be pretty hard to draw! We shall see. :-)

Friday, 15 April 2011

Book Illustration - 'Caris'


This is a book illustration I worked on this week, of "Caris" the angel. A few hours in photoshop. Hopefully more illustrations from this book to follow. :-)

(p.s. I know the wings are not anatomically correct - it was the client's wish that they be drawn this way).

Monday, 11 April 2011

Oscar & Marco WIP4


About another hour and a halfs work and Oscar is done! :-) 5 hours so far; roughly on target with where I want to be with this piece.

Sunday, 10 April 2011

Oscar & Marco WIP3


About another hmm.. half an hour on this? I'd say 3 and a half hours so far on this piece. Have detailed the middle of Oscar's face and the left side around and including his eye. I really dont want to stop drawing this but I shall have to put it down for tonight..! Can't wait to pick this up tomorrow. :-D

Oscar & Marco WIP2


So, WIP 2 after another session yesterday. Here I've spent time detailing Oscar's left ear and upper face. Another hour and a bit here? I'd probably say 3 hours so far on this now.

Oscar & Marco WIP1


So I had to drop my Brian Cox drawing for the moment, to do a commission of two siamese cats, but I don't mind as this should be a fun and interesting challenge! I'll come back to you soon Brian, lol. :)

Lots of work will go into this as I'm not really an animal artist. So lots of practice, here!
I've started drawing Oscar here (Marco is currently the big white space... lol). Have blocked in the very rough colours. I'd say an hour and a bit to this stage, perhaps?

Thursday, 7 April 2011

Brian Cox Digital Portrait WIP 6


About another hours work. Have defined the right eye (right eye as you look at it, his left eye), and the nose. I'm up to 4 hours on this so far. :)

Tuesday, 5 April 2011

Brian Cox Digital Portrait WIP 5


Another half an hour. Zoomed in on the face this time - worked on the forehead/nose/right eye area. :)

Brian Cox Digital Portrait WIP 4


Another 20 minute session this lunchtime. Have shaded the jacket and started on the hair! :-)

Tuesday, 29 March 2011

Brian Cox Portrait WIP 3


Sorry for my recent absence! I've been busy lately. I haven't actually drawn anything since I last uploaded here. :-( So anyway, half an hours more speedpainting work on my Brian Cox portrait this lunchtime. Loving it so far! Really nice to slap lots of colours down roughly, can't wait to start refining now!

Friday, 11 March 2011

Brian Cox Digital Portrait WIP 2


This is after half an hour of slapping on colour in my lunchbreak. Here I am just laying down some colours and very rough shading. :-)

Thursday, 10 March 2011

Brian Cox Digital Portrait WIP 1


So I have started a picture of the one and only Dr Brian Cox, the "rock star" physicist.

Here's my sketch - about an hour - an hour and a halfs work. I have gridded the reference picture and my canvas and drawn in the detail that way. I find it less intuitive than freehand sketching, but overall favour it as it gives a more accurate sketch in terms of proportions. :-) Overlaying this on my reference image, it's almost spot on, so I'm happy with that!

The sketch is always the very scary stage where it looks nothing like the person!! Lots of fingers crossed at this stage! :-)

Sunday, 20 February 2011

Field of Lilies Redo - FINAL!


This piece has been so so long in the making, I can't quite believe it's done!

The original concept was born in December 2008 when my Grandma passed away as something to remember her by and this is the second reincarnation of the original concept (which was cute but this is heaps better). You may remember the original concept from way back in my gallery?

I'm glad its finished, anyway. Although I realise there are some areas which could be improved, I'm happy to call this piece done. I think any improvement will be made in future pieces, rather than me coming back to this one. I've certainly not drawn so much fabric before, but I think I did ok on that.. I hope, anyway!

So.. countless hours on Photoshop, over countless months, but it's done, so, enjoy.

Does anyone want me to post up any detail shots?

Saturday, 19 February 2011

Field of Lilies Redo WIP 13


A good few more hours on this one. Not much progress but, I'm finding the last bits of fabric really heavy going. I hope to finish it soon...

Saturday, 5 February 2011

Sunday, 30 January 2011

Field of Lilies Redo WIP 11


I managed to do a teeny tiny bit more work yesterday (Saturday morning).. :-)

Thursday, 27 January 2011

Field of Lilies Redo WIP 10


Its been two whole months since I last worked on this piece, but I saw it sat in my art file on my PC the other day and wondered how I could have ever forgotten it or lost the will to work on it. so I have picked it up as something to work on hopefully to fruition this time. This concept has now been over two years in the making, and this is the second incarnation. Its a joy to work on. Theres still work to do but I'm really gettting there with this piece. :-)

Photoshop however has randomly erased all of my custom brushes. I am very unimpressed with this! I was really proud of my new grass brush and my painting brushes were all JUST how I liked them, now I cant seem to find that perfection again. What a pain computers can be!!

Saturday, 22 January 2011

Portrait Commission Final


Can't believe I forgot to post this here.. sorry! Enjoy :-) This is a commission I finished a few weeks ago now.

Saturday, 8 January 2011

Portrait Commission WIPs


Some WIPs of a commission I just finished. This is the son of a guy I shoot with (competition archery, not archery/guns for hunting. Guns/hunting are bad, kids!).

First two were taken on my phone (hence poor quality), the second two were taken on my camera (hence better quality). Final piece will be posted in my nest blog update.

Had quite a bit of fun on this, this little chappie has a nice cheeky grin which was quite a challenge to capture, but I think I have done well! :-) Fingers crossed my client likes it. :-)

Took roughly the usual amount of time for a portrait this size, though to be honest I wasn't too on the ball about keeping track of my time on it this time so I may have gone over a bit, I'm not sure. Used the usual mechanical pencil for it all, and deepened the shading with some nice soft B pencils, up to 4B this time. :-)

Enjoy! :D

Wednesday, 8 December 2010

Mistletoe - WIP 8


Have finished the male character now, going to move onto colouring the female character next! :-)

Monday, 6 December 2010

Sunday, 5 December 2010

Mistletoe - WIP 6


Now you can see I've added the final lighting effects and also the fire! I need to add the christmas decor and the background will be finished. I will be hiding the lighting effects whilst I paint the characters, though, and just showing them on the final result. I'm really liking how this is turning out already... :-)

I think to date I've spent 7 hours on this piece so far.

Mistletoe - WIP 4 & 5


Ok, at the top is WIP 4! I've painted in most of the background now (just need to add a cosy fire to that fireplace and some Christmas decorations!).

The bottom picture, WIP5, shows how I've changed the colour scheme. I like this one more, its warmer and more appealing so I will stick with this one for now, methinks.

Saturday, 4 December 2010

Mistletoe - Flat Colours


Flat colours for the commission I'm working on. Next, for the background. :-)

Mistletoe - Sketch

This is (hopefully) the final sketch for the commission I submitted concepts for yesterday. I really like this! God bless Posemaniacs.com though, that site is great for pose stock to help with anatomy! I'm having a lot of fun on this piece so far!

Subject to the commissioners approval I can start painting this up. I'm really looking forward to it!

Friday, 3 December 2010

Mistletoe - Concepts

Some concepts for a commission.. :-)

Ok so, Concept 1 (top) is meant to be the two characters laying down (on a bed?) with the male dangling some mistletoe! I thought maybe they could also be laying ona rug with a fire in the background, or a window to a snowy scene, etc etc.

Concept 2 (bottom left) is meant to be the characters snuggled up in bed.

Concept 3 (bottom right) could be a more easily adapted scene in terms of location. Indoors, next to a roaring fire? On a snowy hill? (etc etc)

Saturday, 20 November 2010

Field of Lilies Redo WIP 9


Took the afternoon off to draw today - its been bliss!

This is a personal project that I havent had time to work on for so long... Its finally taking shape. Think I may share my new custom grass brush on my website at some point when I have time to compile a ZIP file to upload with instructions :) The lilies were fun to do :D

Havent finished the background yet, but have run out of time for now! Can't wait to get back to this.. :-)

Wednesday, 17 November 2010

Revision is chasing me - send help!

Exams are taking over my life - apologies for my absence.... - freedom approaches on December 2nd!!!

Sunday, 31 October 2010

Art Clay Exploits: Part 3

Polishing, firing & Finishing: a.k.a. Ultimate Disaster Occurs!

After leaving my piece to dry from Friday night until Saturday afternoon, with a couple of bursts of the hairdryer too for help, I sanded down my piece, using a simple nail file. I was able to easily remove most of the imperfections and lumps and bumps - I spent a few hours on this section; picking it up, doing a few minutes until it looked "fine", then leaving it for a while, coming back to it, seeing all the new imperfections I hadnt noticed, refiling it... rinse and repeat. Like you would with an art piece, leave it and return several times, and hold it at arms length, honestly criticising it to try and make the best of your piece. :-)

To make sure it was truly dry I did not fire it until Sunday afternoon.


I fired my piece on my gas hob. As such, I purchased this handy metal net to rest my piece over the hob on. The smaller finer piece, is cut specially so you may bend it into a box shape (shown a few steps below), which means that if, for whatever reason your piece spits, or explodes (etc) its contained.


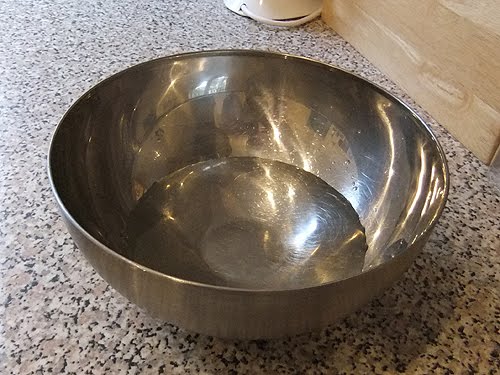
I filled a stainless steel bowl with some water to finish off cooling the piece (I dont know how important the stainless steel part is really, my instruction sheet specified it, so seeing as we had some in the cupboard I used it.... might try it without though).


Timing is important - I took off my watch so I could observe the time easier. I fired for a total of five minutes.


I switched on the hob, to find the hottest part of the steel net (which part glowed red), picked a red spot to put my piece on, then turned off the hob so I could safely lay my piece on it, with a pair of cheap tweezers I bought from Tescos the other day for the purpose. Very handy!


I laid on my piece, formed the little box from the smaller steel mesh as shown about and placed it over the piece, lighting the hob again after. Now, there are two things to note here; firstly, my piece looked rather unremarkable for the whole firing. No burning, spitting, glowing.... absolutely zilch. Did I do it right? Who knows. The piece shrunk by the recommended 10% so.. I can only hope so!

Secondly to note; the smell. Oh my god the smell. THE SMELL WAS HORRENDOUS...... Now, as it turns out this was *not* the fault of the silver clay, but rather the mother of pearl setting.. which as you can see below.... does not have a very high tolerance of temperature.


That is to say, it was totally, utterly destroyed. Such a shame.. Lucky that it was a cheap gem to buy, but its still a sad shame. It was so so beautiful. :-( Needless to say, that was unsalvageable. As you can also see, the silver shrunk so much it cracked noticeably. I'm not sure how to get around that..?? Maybe you have to use it in much thicker quaitities (I shall certainly try that..) to avoid this. So, a disaster all round, really.


Then one of the leaves fell off. Oh bother, was that the final straw! After leaving it to cool for the recommended 15 minutes, I dunked it in the bowl of water, and dried it off, before setting about to see if I could salvage it.

Well beyond repair.

Um.... really... REALLY... beyond repair. The shattering of the mother of pearl was actually quite pretty (the internal layers had retained normal pearlescent sheens) but unfortunately not suitable for me to use anymore...


Firstly, I took off the mother of pearl (it came away easily), and chipped away the raised border I had creates, as totally as I could.


Using the magical polishing cloth I bought, and also the steel toothbrush too, I furiously scrubbed and rubbed until my piece polished up (this is the front, you can see the remains of the border...). The nice matte silver finish was quite pretty (but I do wonder how to get it truly shiny..).

You can also see two fracture lines: as the piece was, let face it, ruined, I decided to test the strength of my piece. Disappointingly, it snapped under very little pressure from my hands, very brittle and fragile (again, must make thicker next time..). Glued it back together - bless super glue! It was to become my good friend during this most hard of rescue missions!! I actually quite like the fracture lines, nice addition of character...


This was the back of the piece, polished. Scrubbed up quite nice actually, very smooth finish. Quite liked this.


In the end, I cut a piece of copper sheet the same size and shape as the mother of pearl, and super glued it in place on the front of the cabochon. This became a two sided piece; this was the back, where I reattached the leaves. Simple, but nice, I think.

I didnt want to leave the front to be a mess though! I also couldnt leave it bare with just he copper sheet on it, as the remains of the border were quite ugly. So, I got out my super huge beading kit, and rifled through it to find something suitable to add on. In the end I went for small turquoise chips (again, glued on).

Overall I think the final pendant is *ok*, but obviously compared to the initial ambition, concept and ideas I had, its nothing in comparison. A disappointment really, but I'm glad I was able to salvage it to soemthing unique and useable (especially since theres about £7 of pure 99.9% silver in the piece....).

Overall, with regards the silver clay, there is obviously a LOT of room for improvement. I'm viewing this experience with mixed emotions.

On the one hand; I failed at something I experimented in, in essence. That incenses me to try harder, and succeed. I do not like to be beaten!! This is a puzzle I will endeavour to solve - at least until I run out of silverclay to work with!

On the other hand; this material is a veritable NIGHTMARE to work with, no shadow of a lie. This may be partly down to my own inexperience, but let face it, when the apparent *slow dry* clay seems to be totally dry within a minute or two of removing from the pack, and the *normal* (i.e. faster) dry clay seems like it will never flipping dry, theres some head scratching and panic on my part! I have learned the hard way never to fire stones/gems - you may lose them (and they may stink out your house in the process...). Don't do it kids, just don't do it!

In conclusion though, would I do it again? Definitely. Like I said, I don't like to be beaten! Its an intruiging material to work with, for sure. Give it a try if you can, but be prepared to lose your money if and when it goes wrong.. then again, maybe just don't make the mistakes I did! ;-)

Kind regards from a beginner,

Let me know how it goes,

Meg!